In case you’re having a headache assembling a portable wardrobe, here’s a guide of portable wardrobe assembly instructions.
Assembling a portable wardrobe can seem daunting at first, but with the right instructions and a bit of patience, it’s a straightforward process that anyone can tackle.
If you’ve ever found yourself struggling to organize your clothes or lacking sufficient closet space, a portable wardrobe can be a lifesaver. But how to quickly assemble a portable wardrobe? Please read carefully portable wardrobe assembly Instructions.
Fear not, dear reader, for I’m here to guide you through the process step by step. From unpacking the box to putting the finishing touches, you’ll soon have your very own portable wardrobe ready to use.
1.What Tools Do You Need?
Before you begin, make sure you have all the necessary tools at hand. Typically, you’ll only need a screwdriver (usually Phillips head) and perhaps a hammer, depending on the design of your wardrobe. Check the instructions provided with your wardrobe to confirm the required tools.
2.Step-by-Step Assembly Instructions
Prepare Your Workspace: Find a clear, spacious area . This will make the assembly process much smoother.
3.Sort and Identify Parts: Take inventory of all the pieces included in the packaging and identify them according to the instruction manual. Group similar parts together to streamline the assembly process.
4.Follow the Instructions: While it may be tempting to dive right in, carefully read through the assembly instructions before starting. Pay close attention to any diagrams or illustrations provided.
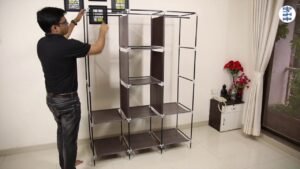
5.Start with the Frame: Begin by assembling the frame of the wardrobe according to the instructions. This typically involves connecting the poles or panels together using the provided connectors or screws. Make sure everything is securely fastened before proceeding.
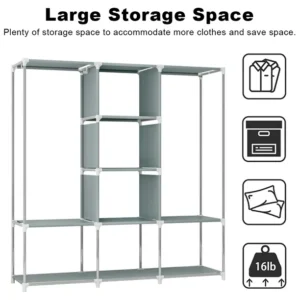
6.Add Shelves and Hanging Bars: Once the frame is assembled, it’s time to add the shelves and hanging bars. These may simply slot into place or require additional screws or connectors to secure them. Refer to the instructions for the correct placement of each component.
7.Secure Any Additional Features: If your portable wardrobe includes features such as doors, drawers, or shoe racks, now is the time to install them. Follow the instructions carefully to ensure they are properly aligned and attached.
8.Double-Check for Stability: Before announcing completion, give your assembled wardrobe a gentle shake to ensure it’s stable and secure. Adjust any loose fittings or connections as needed to prevent accidents later on.

Tips for Success
Take Your Time: Rushing through the assembly process can lead to mistakes and frustration. Take it slow and methodically follow each step to ensure everything fits together properly.
Keep the Manual Handy: Don’t discard the instruction manual once you’ve finished assembling your wardrobe. Keep it in a safe place for future reference, especially if you ever need to disassemble or move the wardrobe.
Conclusion
Assembling a portable wardrobe may seem like a daunting task, but with the right approach, it is very simple. By following the step-by-step instructions provided and keeping a few key tips in mind.